Friday, August 30, 2013

DIY Mason Jar Tiki Torch

Hi Ya'll! A lot of you seemed very interested in my Mason Jar Tiki Torches I made a few days back! Well here is a tutorial of how I made them! Super simple and super cute!


Supplies:

1. Mason Jars with lids
2. Replacement Tiki Wicks
3. Drill and large Drill bit
4. Tiki "Fuel"
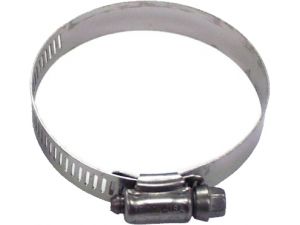
5. Radiator Clamps (optional)


Total cost per Tiki Approx Under $3.00 each


First.... get your drill and drill bit ready. I just left the lid on and drilled a hole in the center of the jar, being careful not to let the drill bit hit the glass. If you don't have a drill, you could cut an X with an Xacto knife and fold the edged down (don't cut yourself, edges will be sharp)


Second I removed the lid, dumped out the shavings in the garbage and added some Fuel** to each Jar. I used the Citronella fuel to keep the bugs away. That was my whole intent when making these, and ok I love tiki's and think they are so pretty.


Third I put the lid back on and dropped a wick into each one then cut off the excess on top, about 1-2 inches. Let the wick sit in the jar about 10 minutes before lighting so the wick can soak up fuel.


**If you want to attach it to the fence like I did, don't add the fuel just yet. I use metal radiator clamps to attach it to my fence. I just undid the clamp, put it around the fence, and started the clamp but didn't tighten it. I then put the jar inside the clamp and tightened it down. Then add the fuel and wick. My reasons for clamping it to the fence was I wanted the torches to be out of reaching distance for my kids. and I wanted no way they could touch it and get hurt, plus adding 5 jars around the yard would hopefully keep the bugs away.


This is seriously so simple to do and takes hardly any time at all. So country and so cute. Please feel free to send me pics of your Mason Jar Tiki torches and I will post them to this blog post! Have fun creating yours! Once they are made, sit down, crack open a cold one and enjoy your work :)
I will try to take some better photos at dark soon =]


Tuesday, August 13, 2013

New, Updates, Weekly Posts, and MORE!

Howdy Ya'll!

  I have decided to start back up my blog and see how it goes. I have some big plans for my blog, including giveaways! I would like to post care tips for the items that I make, and some new ideas, including camo, country, and rustic décor, and maybe some yummy comfort food recipes! Oh so many ideas! I will really try to commit to this and I hope ya'll enjoy it!

  As you might have noticed I am getting close to 2,000 fans on facebook. Eeek, so exciting! I would love to have a huge giveaway on here! If you own a boutique I would love to have you participate in the giveaway, but we will talk about that later.

 Handmade items can seem intimidating to take care of. Yes they doo require special care, but I can help with that. In later posts I will post instructions, including pics, of how to keep your items looking their best. And yes I do have some tricks up my sleeves!

 I am always coming up with new ideas, and most of the time I don't get to share them with you. Honestly, there are so many things I would love to share, but I don't feel like it is appropriate to share them on my facebook page. A perfect example is recipes, and fun things to do with kiddos, ect.

 I am hoping to get a good response and I am planning a small giveaway to get to 2,000 fans so I can do a huge giveaway! Please follow my blog and feel free to share it with your friends! I promise I wont go blog crazy and fill your inbox with junk. I will try to keep the posts to 1 or 2 per week, most likely on the weekend. I would also like to have some feedback on this blog idea. Let me know what you like, don't like, want to see, don't want to see, ect. I want to be here for my amazing fans!

I am off to make my kiddos lunch! I am thinking about dedicating my next blog post to be about me, if you would like to get to know me and see who is behind Simply Country. Yes, No Maybe? Let me know!


Have a great day!
Emily

Simply Country Crafts Etsy Shop